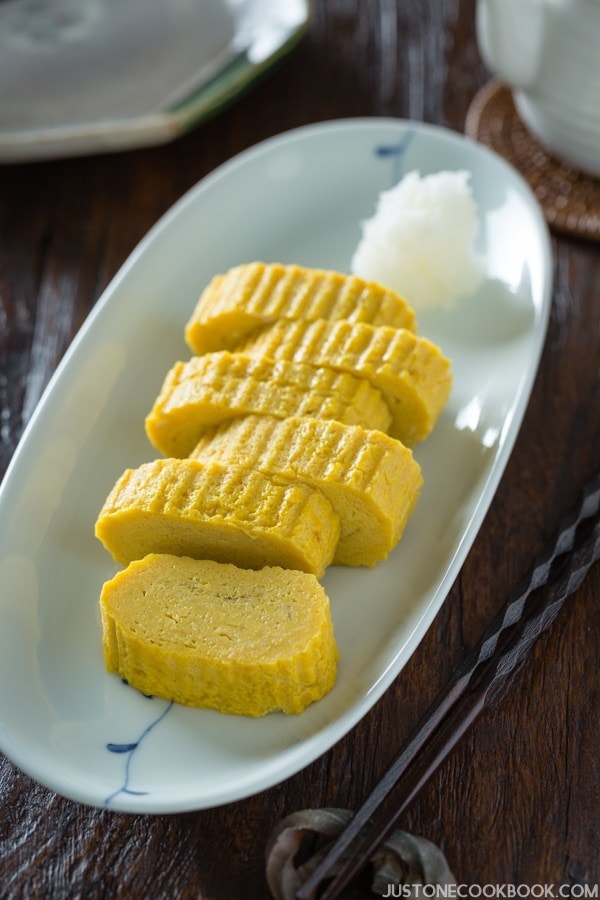
Tamagoyaki (卵焼き or 玉子焼き) is a Japanese rolled omelette, and it is commonly served as part of Japanese style breakfast or put in a bento (Japanese lunch box) as a side dishes.
What you may not know is that when dashi is added to the egg mixture, the dish is actually called Dashimaki Tamago. (出し巻き卵). Dashi is the Japanese stock made of kombu (edible kelp) and Katsuobushi (smoked bonito flakes), maki in Japanese means to roll, and tamago means eggs.
However, when you make dashimaki tamago, the amount of dashi added along with liquid seasonings makes the egg mixture into watery consistency. If you’ve never made this before, I highly recommend to start with tamagoyaki first, then add dashi to egg mixture and slowly increase the amount of dashi. In general, 1 tablespoon of dashi per egg is good ratio, but you can definitely add more when you become an expert.
My original recipe uses 4 tablespoon of dashi for 3 eggs, but I have changed my recipe for this updated version with 3 tablespoon of dashi so that it’s a tiny bit easier to make.
My answer is yes you can, as long as you are not aiming for the classic tamagoyaki shape. I demonstrated and showed you how to do it in today’s recipe. A tamagoyaki pan definitely helps making the rolled omelette into a nice thick rectangular log shape; however, don’t worry, a round frying pan will work.
As you can see with the result, it will be flatter when your frying pan is bigger. If you only have 12-inch pan, then you can solve the “flat” issue by doubling the recipe. If you don’t mind the particular shape, then don’t worry about it.
Now, if you’re concerned about non-stick coating, you can use a cast iron skillet. However, please remember that you will need to control the amount of heat by lifting the pan from the stove and a heavy skillet would be challenging.
I’ve tried using a stainless steel frying pan for tamagoyaki, but without adding a bit of oil, I haven’t been successful. Plus, I don’t like my tamagoyaki too oily.
In general, I refrain from using non-stick cookware, but it is easier to make with non-stick pan compared to stainless-steel or cast iron skillet.
If you don’t mind paying a little more for the pan, this copper tamagoyaki pan (nickel coating insinde) is a great choice. The copper transfers heat so easily, and the pan is very light that you can move the pan easily while cooking.

Too difficult? It requires some practice, but if you want to take a short cut, try this Quick & Easy Tamagoyaki recipe. You can make it in 3 minutes! It’s perfect to make just one tamagoyaki for your meal or bento box!

What you may not know is that when dashi is added to the egg mixture, the dish is actually called Dashimaki Tamago. (出し巻き卵). Dashi is the Japanese stock made of kombu (edible kelp) and Katsuobushi (smoked bonito flakes), maki in Japanese means to roll, and tamago means eggs.
Difference with Tamagoyaki and Dashimaki Tamago
The big differences between these two rolled omelettes include the flavors, texture, and how difficult it is to make these rolled omelette.Flavors for Tamagoyaki
Tamagoyaki is often seasoned with soy sauce and sugars, but nothing can beat the flavor of dashi. Dashi is very simple to make, but umami-rich kombu and katsuobushi gives this stock wonderful rich flavors without overpowering the other ingredients. By adding dashi to the egg mixture, the egg gets nice umami boost and dashimaki tamago has much deep, complex flavors than regular Tamagoyaki.Texture
When dashi is added to the egg mixture, the liquid gets thinner. Hence, the resulting texture for final dashimaki tamago is more refined and it has finer texture than Tamagoyaki. It’s also juicier due to the higher liquid content in the egg mixture. When sushi restaurants and diners in Japan make their own dashimaki tamago, they make it with more dashi in the egg mixture. As a result, it’s difficult for dashimaki tamago to keep the rectangular shape and often it’s flatter and a little de-formed. But the taste is really amazing!Difficulty in Making
Last but not least, you may wonder how difficult it is to make tamagoyaki or dashimaki tamago. For tamagoyaki, the egg mixture is thin out with a little bit of liquid seasonings, so it’s still manageable and pretty easy to handle when you roll out the egg.However, when you make dashimaki tamago, the amount of dashi added along with liquid seasonings makes the egg mixture into watery consistency. If you’ve never made this before, I highly recommend to start with tamagoyaki first, then add dashi to egg mixture and slowly increase the amount of dashi. In general, 1 tablespoon of dashi per egg is good ratio, but you can definitely add more when you become an expert.
My original recipe uses 4 tablespoon of dashi for 3 eggs, but I have changed my recipe for this updated version with 3 tablespoon of dashi so that it’s a tiny bit easier to make.
Purchase Tamagoyaki Pan or Not
Many of my readers had asked me if they can make this recipe with a round pan because it’s not easy to find a good quality tamagoyaki pan outside of Japan, and they can also be pricey.My answer is yes you can, as long as you are not aiming for the classic tamagoyaki shape. I demonstrated and showed you how to do it in today’s recipe. A tamagoyaki pan definitely helps making the rolled omelette into a nice thick rectangular log shape; however, don’t worry, a round frying pan will work.
What Kind of Round Frying Pan?
I recommend using 9 or 10-inch non-stick frying pan for a thicker tamagoyaki. In the recipe below, I used my 12-inch pan which works as well.As you can see with the result, it will be flatter when your frying pan is bigger. If you only have 12-inch pan, then you can solve the “flat” issue by doubling the recipe. If you don’t mind the particular shape, then don’t worry about it.
Now, if you’re concerned about non-stick coating, you can use a cast iron skillet. However, please remember that you will need to control the amount of heat by lifting the pan from the stove and a heavy skillet would be challenging.
I’ve tried using a stainless steel frying pan for tamagoyaki, but without adding a bit of oil, I haven’t been successful. Plus, I don’t like my tamagoyaki too oily.
In general, I refrain from using non-stick cookware, but it is easier to make with non-stick pan compared to stainless-steel or cast iron skillet.
If you don’t mind paying a little more for the pan, this copper tamagoyaki pan (nickel coating insinde) is a great choice. The copper transfers heat so easily, and the pan is very light that you can move the pan easily while cooking.
Helpful Tips for Making Tamagoyaki
Everyone has different cooking skills and this dish might require you to practice a little bit until you shape them perfectly, especially if you want to make dashimaki tamago. Here are a few helpful tips from me.- Do not worry about first few rolls. The inner rolls do not need to be neat at all, as you will keep rolling more layers on top. The first few rolls are the center of the tamagoyaki, so even if the layers are not perfectly lined up, do not worry!
- Do not skip oiling the pan. I know you want to use less oil. Me too! However, make sure you coat the pan with oil very well. You don’t want your egg mixture to stick on the pan – even for non-stick pan.
- Wait till the pan is completely heat up. Test the temperature of the pan with the small amount of the egg mixture. You need to see the egg sizzle to confirm the pan is hot enough.
- Don’t turn off the heat; instead move the pan away from the heat source. Keep your heat at medium heat all times. Thin omelette layer needs to be quickly rolled up before it’s completely cooked, so there is no time for you to adjust the heat. The best way to control the heat is to move the pan closer and away from the stove.
- Flip the omelette toward you while you lift up the pan. It’s easier to see what I mean in the video, but you probably need the upward motion to roll the heavy thick roll of omelette (toward the end).
Cut each piece of tamagoyaki diagonally to create “heart” shape.
Tamagoyaki (Japanese Rolled Omelette)
Prep time
Cook time
Total time
Author: Namiko Chen
Serves: Serves 2
Ingredients
- 3 large eggs
- 2 Tbsp. cooking oil (vegetable or canola)
- 1½ sheet nori (optional)
- 1" (2.5 cm) green part of daikon radish (it's sweeter than white part)
- Soy sauce
Seasonings
- 3 Tbsp. dashi (Use Kombu Dashi for vegetarian)
- 2 tsp. sugar
- 1 tsp. soy sauce
- 1 tsp. mirin
- 2 pinches of salt
What you will need:
- Tamagoyaki frying pan (or a around 9" or 10" non-stick frying pan)
- Long cooking chopsticks
- Bamboo mat

Instructions
- Gently whisk the eggs in a bowl. It's best to "cut" the eggs with chopsticks in zig-zag motion and do not over mix it.

- In another bowl, combine the seasonings and mix well.

- Pour the seasonings mixture into the egg mixture and whisk gently. Then pour the mixture into a measuring cup with spout and handle (so that it'll be easier to pour into the frying pan).

Tamagoyaki Pan
- Heat the pan over medium heat, dip a folded paper towel in oil and apply to the pan. Put a little bit of egg mixture to see if the pan is hot.

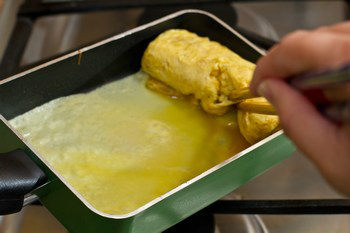
- When you hear the sizzling sound, pour a thin layer of egg mixture in the pan, tilting to cover the bottom of the pan.

- Poke the air bubbles to release the air. After the bottom of the egg has set but still soft on top, start rolling into a log shape from one side to the other.
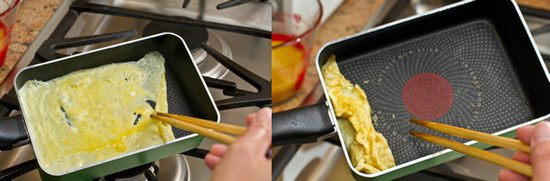
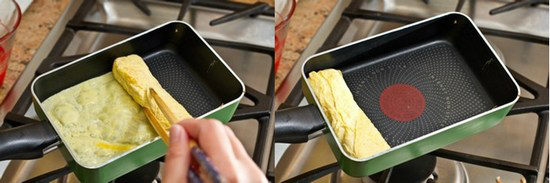
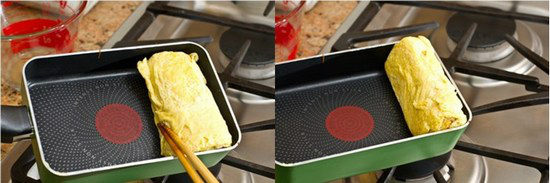
- Move the rolled omelette to the side where you started to roll, and apply oil to the pan with a paper towel, even under the omelette.

- Pour the egg mixture to cover the bottom of the pan again. Make sure to lift the omelette to spread the mixture underneath.
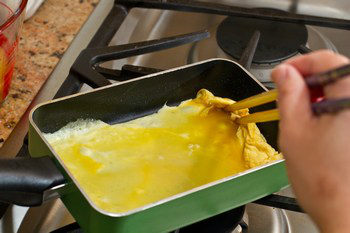
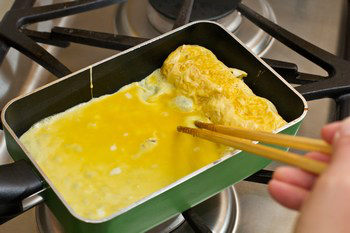
- When the new layer of egg has set and still soft on top, start rolling from one side to the other.
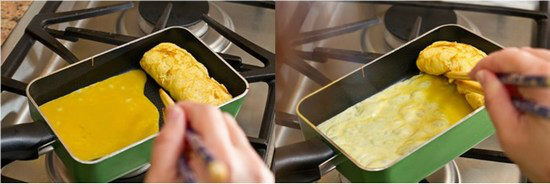
- Move the rolled omelette to the side where you started to roll, and apply oil to the pan with a paper towel, even under the omelette.

- Pour the egg mixture to cover the bottom of the pan again. Make sure to lift the omelette to spread the mixture underneath.
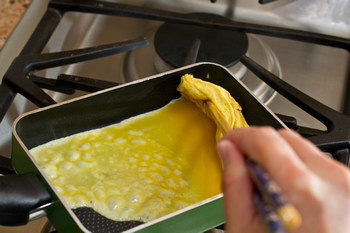
- When the new layer of egg has set and still soft on top, start rolling from one side to the other.
- Now this is 3rd round. Poke the air bubbles...
- The 4th round. Make sure to spread all over including under the rolled egg.
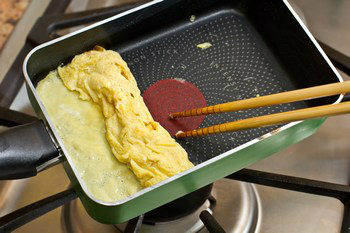
- Continue rolling into the log.
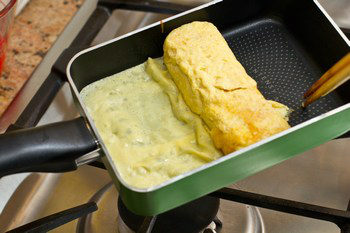
- This is 5th round.
- This is 6th round and final...

- You can brown the omelette a little bit.
- Remove from the pan and place the omelette on the bamboo mat and wrap it up. Shape the egg when it is still hot. Let it stand for 5 minutes.

Round Frying Pan
- Heat the pan over medium heat, dip a folded paper towel in oil and apply to the pan. Put a little bit of egg mixture to see if the pan is hot. When you hear the sizzling sound, pour a thin layer of egg mixture in the pan, tilting to cover the bottom of the pan.

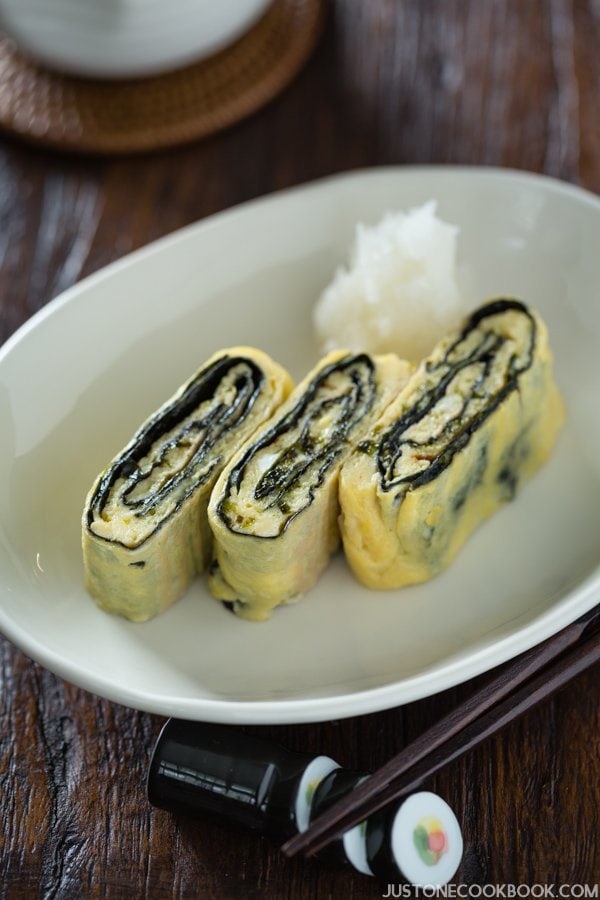
- Poke the air bubbles to release the air. After the bottom of the egg has set but still soft on top, start rolling into a log shape from one side to the other. Here I put half sheet of nori and then rolled (optional).

- Move the rolled omelette to the side where you started to roll, and apply oil to the pan with a paper towel, even under the omelette. Pour the egg mixture to cover the bottom of the pan again. Make sure to lift the omelette to spread the mixture underneath.

- When the new layer of egg has set and still soft on top, start rolling from one side to the other. This is optional but I put another layer of nori sheet before rolling.

- Move the rolled omelette to the side where you started to roll, and apply oil to the pan with a paper towel, even under the omelette. Then pour the egg mixture to cover the bottom of the pan again. Make sure to lift the omelette to spread the mixture underneath.

- When the new layer of egg has set and still soft on top, start rolling from one side to the other. I put another sheet of nori here before rolling. Continue until all the egg mixture is finished.

- Remove from the pan and place the omelette on the bamboo mat and wrap it up. Shape the egg when it is still hot. Let it stand for 5 minutes.

To serve
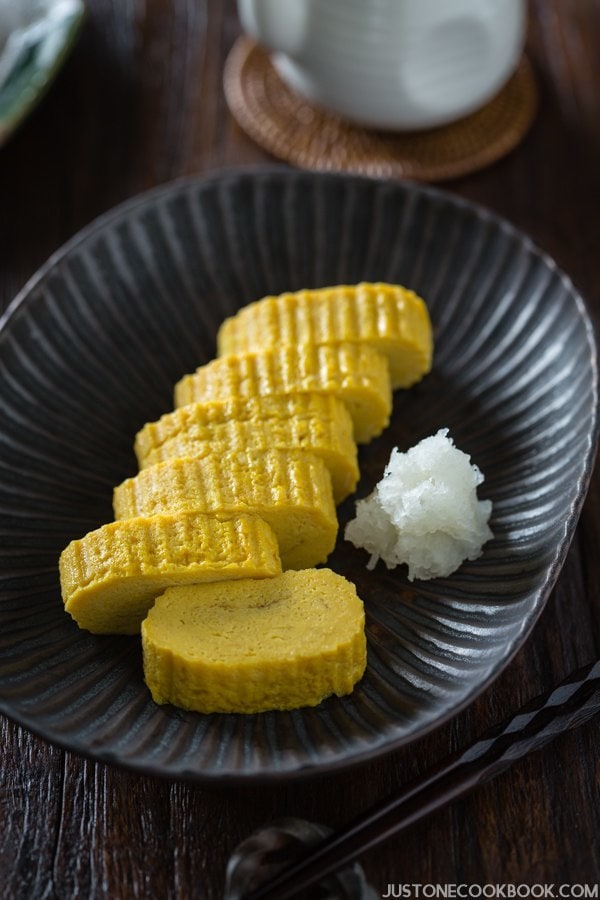
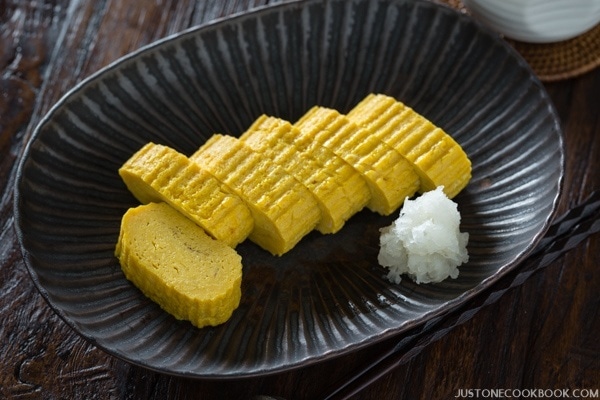
- Slice the omelette into ½" (1 cm) pieces.

- Peel and grate daikon. Gently squeeze water out. Serve Tamagoyaki with grated daikon and pour soy sauce over daikon.

Notes
Control the temperature of the pan by lifting the frying pan rather than adjusting the stove heat. If the heat is too weak, the egg will stick to the frying pan so be careful.
Recipe by Namiko Chen of Just One Cookbook. All images and content on this site are copyright protected. Please do not use my images without my permission. If you’d like to share this recipe on your site, please re-write the recipe and link to this post as the original source. Thank you.
Recipe by Namiko Chen of Just One Cookbook. All images and content on this site are copyright protected. Please do not use my images without my permission. If you’d like to share this recipe on your site, please re-write the recipe and link to this post as the original source. Thank you.
Comments
Post a Comment